Skill4Glory

Skill4Glory Powering all Skills with Digital Technology to enhance Personal development and attain Financial freedom.

Our social:
  • Home
  • About
  • Vocational
  • ICT
  • E-Business
  • Webinar
  • Videos
  • Contact

Latest Post

Showing posts with label Vocational. Show all posts

Sunday, 20 June 2021

Beauty Skills of a Male Hair Stylist
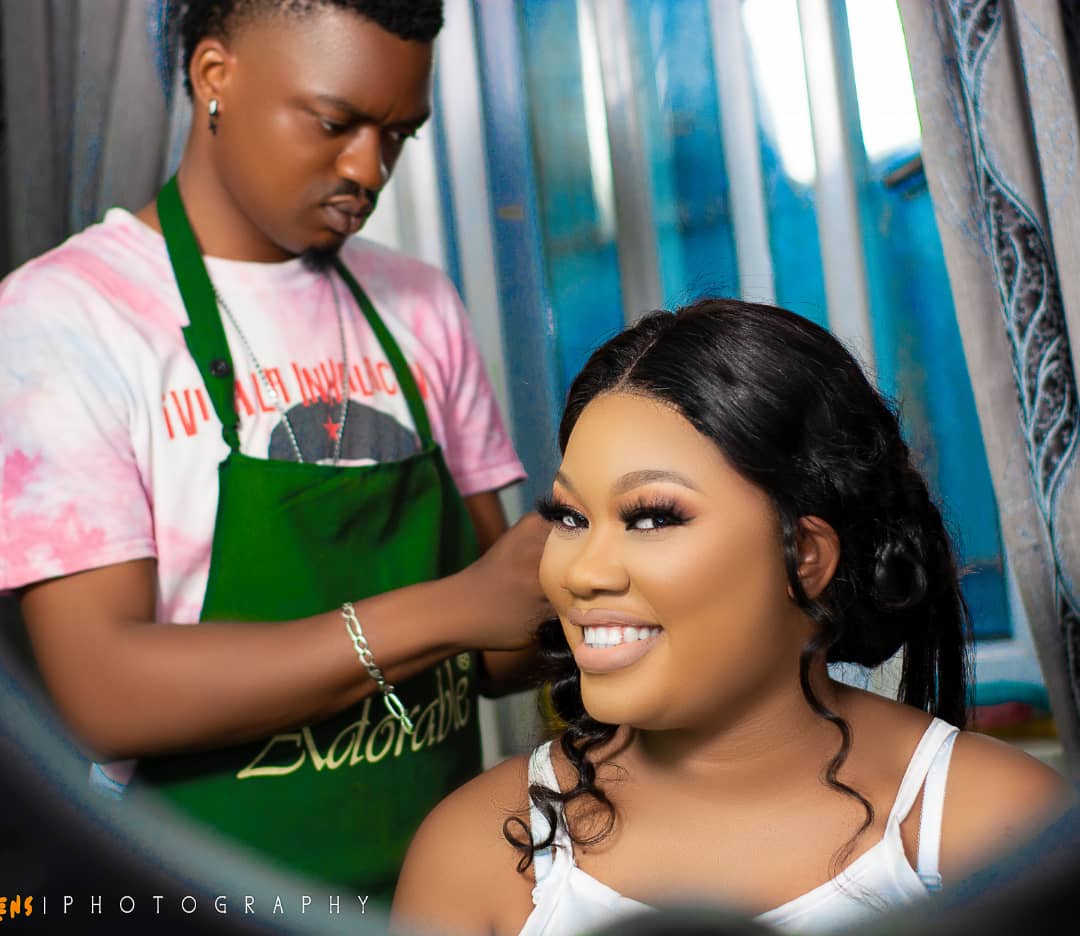


 It however still remains a mystery how men would become better at dressing a woman’s hair—a business that was traditionally female, than women themselves.

WHEN you think hairdressing, you naturally think women and nothing more. But that isn’t the case anymore as more and more young men continue to give female hairstylists a real run for their money. 


The Story of a young man popularly known as Dadon is one that is of high inspiration, to encourage youths into acquiring skills that would make their lives more meaningful.


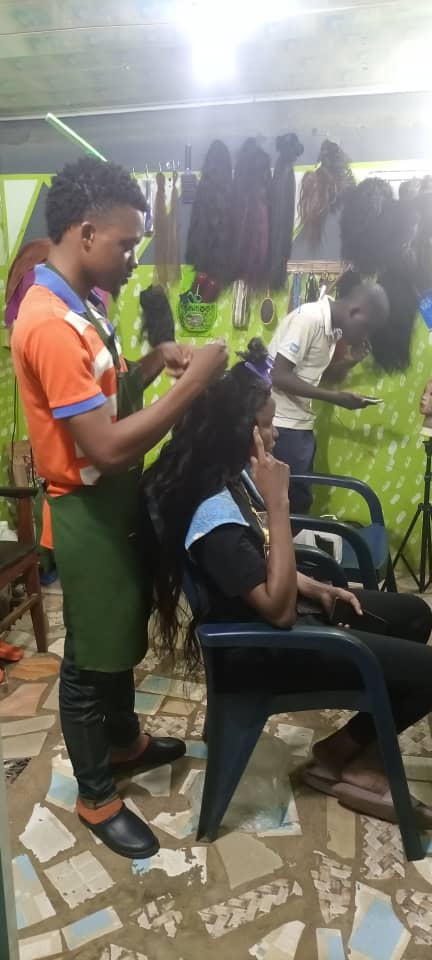
Interestingly, this young  man does not require a luxurious shop to steal the hearts of female customers. With a make-shift salon of simple kind, he is able to compete with those with luxurious shops. Just to stay relevant and earn a living..


His services are fixing of Weavon, braiding of hair, others include short hair style, he also does fixing of nails, and fixing of Eye Lashers, and Wig.


An Interview with the young Man 

Skill4Glory: What is your business all about?

Dadon: My Business is all about making people look beautiful, most especially ladies. I do this by working on their hair.

Skill4Glory: Is your location suitable/convenient for your customers?

Dadon: Yes, it is and they are not complaining. I am still looking for a better location that is bigger than my present shop, I hope to grow bigger one day and I know that God will do it.

Skill4Glory: What assistance would you want from Government or Non-Governmental Organization (NGN).

Dadon: My response to that question is that government should assist us considering the fact that we are talented and skilled. The result of my work is a proof that I am not lazy. We have quite a number of youths like me that are talented and skilled. Government and Non-Governmental Organizations should come to our aid.

Skill4Glory: How do the ladies feel allowing a man to make their hair?

Dadon: My female customers feel comfortable having me as their hair stylist. This is because some of them like to show off that their hair was made by a Man. Considering the fact that I take my time to give them the best, without rushing.

Skill4Glory: How did you develop interest in the business?

Dadon: I developed personal interest as a hair stylist through my mother. She was a hair stylist herself and I do follow her to her shop as a kid. My Dad never liked the idea of me becoming hair stylist, he often discouraged me, but latter gave up when he discovered that my passion for it was getting stronger. My Mother gave me her full support, and that gave me the encouragement to push further as a hair stylist.

Skill4Glory: What is your academic background?

Dadon: My academic career is in progress, after SSCE looking forward to further my education as I continue my business. I am also an artist,  I have passion for drawing.

Skill4Glory: As a Nigerian youth how do you classify yourself? Lazy or hard working.


Dadon: I classify myself as hardworking Nigerian youth that is why I am showcasing my talent. Nigerian youths are hardworking and not lazy. We will continue to hustle for a better life with the talent that God has given us. By the Grace of Almighty God in Jesus name we will make it, either here in Nigeria or anywhere abroad with our God given talent.

Skill4Glory: Were you forced into this business, or you developed personal interest in it?


Dadon: I developed Interest in the business through my mother when I was in secondary school. When I was in JS1 I started helping my mother out in the salon. She has apprentices learning from her at the salon, and I used that opportunity to learn as she teaches them. I was never at anytime forced into the business.

If you need any of these services, he is available in Ibadan around Dikat area, along ring road.


Anytime you find yourself in Ibadan and you want to look beautiful, get in touch with him through any of the following numbers; 07055598446, 09078605113.

Give him a try and you will be glad you did.

Let us encourage the Nigerian youths, they are not lazy.


  • Sunday, 20 June 2021
  • 1 comment
  • Vocational
  • More

Saturday, 9 May 2020

How to Make Effective Hand Sanitizer


SCRUBBING YOUR hands properly with soap and water, is one of the best ways to stop the spread of germs and viruses, and to ensure you don’t get sick yourself. 

But if you don't have access to soap and clean water, or if you're out and about  nowhere near a sink, you should carry hand sanitizer to protect your health.

Making your own hand sanitizer is remarkably easy. Make sure that the tools you use for mixing are properly sanitized; otherwise you could contaminate the whole mixture.
It is recommended that you let your mixture sit for a minimum of 72 hours after you're done.Just to make the sanitizer have time to kill any bacteria that might have been introduced during the mixing process.

The Standard Recipe
                     I.        Isopropyl alcohol
                   II.        Glycerol or glycerin
                 III.        Hydrogen peroxide
                 IV.        Distilled water 
                   V.        Spray bottle

The Mixture mix recommended by the WHO.
Mix 12 fluid ounces of alcohol with 2 teaspoons of glycerol.
Mix in 1 tablespoon of hydrogen peroxide, then 3 fluid ounces of distilled or boiled (then cooled) water. 
(If you're working with a lower-concentration solution of rubbing alcohol, use far less water; remember, at least ¾ of your final mixture has to be alcohol.)
Load the solution into spray bottles—this isn't a gel, it's a spray. You can wet a paper towel with it as well and use that as a wipe.
If you must, you can add in a splash of essential oil to the mixture to make it smell nice,


The Home-Made Recipe
  1. Isopropyl alcohol 
  2. Aloe vera gel 
  3. Tea tree oil 
Mix 3 parts isopropyl alcohol to 1 part aloe vera gel. Add a few drops of tea tree oil to give it a pleasant scent.


  • Saturday, 9 May 2020
  • 1 comment
  • Vocational
  • More

Wednesday, 26 July 2017

How to produce laundry starch


Laundry starch production is a money spinner. Well-packaged starch in shops attract higher prices. Investing in the business is quite rewarding.
Starch is produced from cassava. 


COLD STARCH METHOD/ FORMULATION
 Cold starch is useful for bringing newness and a new lease of life to waxed fabrics during or after laundry operations. It is also useful for application on a wide range of textile materials and headgears for women.
  Chemicals needed
 P.V.A. 3 unit (White gum paste) Nitrosol ¼ unit (powder) Texapon 1/8 unit (jelly-like paste) Perfume 1/10 (liquid) Formalin 1/10 unit Clean water 17 unit (liquid)
  PRODUCTION PROCEDURE
 Pour ¼ unit nitrosol into 12 unit of water in a bucket (we shall refer to it as ‘Bucket A’). Mix and turn continuously with a turning stick as you pour it into the bowl gently stir  while it thickens.  Important: Continue to turn gently so that it doesn’t form lumps or seeds. After a while (say 30 – 45 minutes), thickness fully forms and liquid solution becomes a pasty, jelly-like mixture.  Next, pour 3unit P.V.A. into another bucket (call it ‘Bucket B’), add 5 unit of water, stir well.  Proceed to the next stage of adding the contents of both buckets together (add the contents of ‘Bucket A’ and ‘Bucket B’ together). Stir well.  Get a small bowl; pour the perfume and texapon together and stir well, add to the mixed natrosol and PVA  Finally, add a slight trace of formalin, Formalin will preserve and protect the product from bacterial and fungi attack.  Stir all together very well.  Your cold starch is now ready for packaging.  Note: If too thick, add some water and stir well


  • Wednesday, 26 July 2017
  • Leave a Comment
  • Vocational
  • More

Sunday, 18 June 2017

Beads Making Business


When getting involved in bead-making business, experience is always of essence. In case you are not inspired then you should make sure to have close at hand specific patterns to work on and if possible, a tutorial that would help you through the process, particularly if you are a beginner. Concerning the bead work pattern make a simple choice if you are a novice. There are  books written by various authors about the craft or visit the bookshops, libraries near you to get materials used in learning how to make Beads.


Materials Needed For Bead Making and Their Cost
Tiger Tail Flexible Beading Wires
It has 10 different colors in it and the length is about 10 mm. They are made of multiple strands of metal, with a nylon coating that can be colored or clear. Flexible beading wires is suitable for many types of beading projects and is available in a number of different metals and thickness. You can get these wires that comes in 10 different colors for N 3200.
Lobster Claw Clasp
This is a hook used at the tip of finished bead work to hold the bead to the neck. There about 100 pieces in a nylon well packed and comes mostly in gold, silver and bronze. This cost N 1000.
Bead Design Board
Bead design board have sections for holding beads and long rows marked with measurement for laying out designs. Cost N 2000
Wire Cutters
This is used to cut different types of wires, wires for bead making. Cost N 3000
Chain Nose Pliers
It has a long narrow nose flat jaws that can grasp and hold wire without marking it. Cost N 2300
Tape Measure
This is used to measure the customers neck for proper neck line. Cost N 500
Beads (Glass, Wood, Clay e.t.c.)
Beads may be found in many diversity, Colors , shapes, sizes and materials. There about 1000 pieces of beads in a container. Cost N 3000
Packs for Beads
This is meant for packaging of finished beads for customers and they come in two ways either nylon pack or carton packs. Nylon packs contains 100 pieces while contains 50 pieces. Cost N 1000

Marketing Materials Needed

Create A Website
Taking your business online by simply creating your web address 
which should talk about your services and materials.
Advertise
Advertising in local news paper and lifestyle magazines. Business cards and flyers. This helps to promote your bead business. You can advertise your business in newspapers for as low as N 4000.
Spread the Word Through Social Media Sites
You can use your face-book and Twitter to attract more customers.Pasting of your bead works through this medium helps your customers to be informed about what is in vogue.
Create A Beading Business Plan
It should cover the following topics:
Business Plan
Target Market 
product Pricing
Marketing
Protocol for tracking inventory, invoices, sales and cost.
With these steps and procedures stated above on how to start Bead-Making Business i believe you do not need huge capital to start the business. It Also generates a lot of profit and it is what most Nigerian women wears in our society today.
  • Sunday, 18 June 2017
  • Leave a Comment
  • Vocational
  • More

Thursday, 15 June 2017

How to Make your own Perfume


Perfume  is a mixture of fragrant essential oils or aroma compounds, fixatives and solvents - used to give the human body, animals, food, objects, and living-spaces a pleasant scent.


Please permit me to explain a bit. The different between body spray and perfume is just the measurement of the chemical use. For body spray, excess of menthol is used and less fragrance eg, 80/90% of methanol and 10/20% of fragrance. Menthol is optional. For Perfume, equal fragrance and methanol is use, eg 50/50 depending how strong and last you want it last when you wear it. If you wish to use it as a business, I can lead you through from production to how you can package it and anything.
Here are the procedures: 

HOW TO PRODUCE BODY SPRAY
Chemicals
Methanol half litre
Menthol Little (Choice)
Fragrance 120 ml 
Colour Choice 

Composition
Dissolve menthol with methanol stir very well, add your fragrance and stir, also add colour (Choice) and stir very well. You now package 

HOW TO PRODUCE PERFUME
Chemicals
Methanol half litre
Menthol Little (Choice)
Fragrance 240 ml 
Colour Choice 

Composition
Dissolve menthol with methanol stir very well, add your fragrance and stir, also add colour (Choice) and stir very well. You now package Note: Fragrance has a lot of names with different fragrances eg blue sea, banana, deep blue etc and the more the fragrance the more it last. Colour is optional also because some colours did stain cloth. So watch the colour you use.
  • Thursday, 15 June 2017
  • Leave a Comment
  • Vocational
  • More

Tuesday, 13 June 2017

How to make Coconut Milk Hair Conditioner


COCONUT MILK HAIR CONDITIONER


Coconut milk not only treats dry, frizzy hair but also deep conditions, moisturizes and strengthens your hair to help prevents and treat hair fall. 
After shower, add a drop of coconut milk to your palm and apply it to the strands of your hair.
If you have very fine hair then use it just at the ends of your hair to keep it split end free and looking  healthy.


Ingredients used for making Coconut milk Hair Conditioner:

  • 1 cup Coconut Milk
  • 5 drops essential oil
  • 1 tablespoon Olive Oil

Procedure for producting and applying coconut milk hair conditioner

  1. Whisk together all ingredients, add water and essential oil
  2. Place mixture in the fridge for a couple of hours.
  3. As it cools, a thin layer of cream will harden on the top.
  4. Remove mixture from the fridge, give it a whirl in the blender, and then pour it into a spray bottle.

  • Tuesday, 13 June 2017
  • Leave a Comment
  • Vocational
  • More

Friday, 9 June 2017

How to Make Avocado Natural Hair Conditioner


AVOCADO HAIR CONDITIONER

Avocados are known to rejuvenate and treat itchy and flaky scalp. They make your scalp smoother by putting in lots of hydration. Conditioning your hair with avocados is one of the best ways to treat and rejuvenate lifeless and lusterless hair and barren scalp.

Ingredients for preparation of Avocado hair conditioner:

  • 1 fully rippen avocado
  • 3 teaspoons honey
  • 1 teaspoon coconut oil
  • 1/4 cup aloe vera gel
  • 1 teaspoon citric juice
  • 1 cup of water

Steps on how to make and apply Avocado hair conditioner

  1. Cut up the avocado, mash with a mixing spoon
  2. Simply blend it together with honey and coconut oil, aloe vera gel, citric juice and water using hand blender (so that no avocado bits remain).
  3. Apply to hair and cover with a shower cap; 
  4. Leave on hair for at least 30 minutes and rinse

  • Friday, 9 June 2017
  • Leave a Comment
  • Vocational
  • More

Thursday, 8 June 2017

How To Make your Own Synthetic Hair Conditioner


Conditioners are additive which enhance the 
feel,appearance,fullness,lubricity,reflectance and general manageability of hair. Conditioning helps protect your hair from harsh weather condition by re-moisturing dry hair and forming a protective layer around hair shaft, which helps to reduce split ends and breakage.


Ingredients used for making Hair Conditioner

The ingredients for Hair conditioner and their functions are:


  • Clodagh wax - this is used for holding the hair,it has less chance of drying out and aids in easy styling of hair.
  • Acetyl alcohol - this is a fatty substance produced by heating coconut oil and palm oil. it's the major component of hair conditioner which allows the conditioner to spread easily over the hair. Without it,the conditioner would probably separate out in the bottle (into oil and water).
  • Shea butter - this ingredient is rich in moisture (moisturizer, vitamin and healing the hair and scalp) - it promotes thick, healthy and lustrous strands of hair.
  • Paraffin oil - used as a solvent and lubricant
  • Dehyquart A - it is a quaternary compound that is preferably used as a conditioning additive; it has a positive effect on wet and dry combability. It is clear,yellowish liquid with a characteristic inherent odour.
  • Petroleum jelly - This works by creating a sealing barrier between your body cells, which keeps moisture and speeds up your skin's natural recovery from dryness, helping it heal from within. Its occlusive function also allows it to protect dry, cracked skin and minor cuts, scrapes, and burns.
  • Industrial camphor - this ingredient is used in conditioner to treat injuries or scalp pains by promoting blood flow in the area affected. It could lead to irritation and reddening of skin when used at high amount.
  • Menthol - this gives a soothing sensation
  • Fragrance - it gives a percievable pleasant smell to the conditioner.
  • Preservative - ingredient used to prevent germs and decomposition of the conditioner. It also prevents various health risks that accompany contamination by germs and bacteria.
  •  Water- used as solvent .
  • Quantity of the Ingredients required to produce synthetic conditioner.

    • 1/2 cup Clodagh wax
    • 1 cup Acetyl alcohol
    • 1 tablespoon Petroleum jelly
    • 1 tablespoon Shea butter
    • 1 cup Paraffin oil
    • 1/2 cup Dehyquart A
    • Fragrance (as desired)
    • 2 tablespoon Menthol
    • 2 tablespoon Industrial camphor
    • 1 tablespoon Preservative 

    Steps on how to produce Synthetic Hair Conditioner

    1. Add 1 cup of Distilled Water to a sauce pan and place on your stove top on medium heat; while this is heating up,measure out all of your other ingredients in a separate bowl.
    2. Add clodagh wax to your heated content and allow it to dissolve
    3. Add acetyl alcohol and allow to dissolve too
    4. Add paraffin oil,shea butter,and petroleum jelly and give them a good stir. It will take at least 5-10 minutes to melt so just keep stirring occasionally using a whisk until your clodagh wax has completely melted. 
    5.  Add dehyquart A and drop the pan from heat immediately,
    6.  Once your wax, petroleum jelly and acetyl alcohol has completely melted, take off the pan from heat and mix using a stick blender or your whisk; you are going to mix until your mixture no longer separates. It will have a milky appearance and not separate into oil and water .
    7.  When you have stopped mixing, at this point you will add your preservative, fragrance ,menthol and industrial camphor and stir till it becomes cool. Once your preservative and fragrance has been incorporated, you are ready to pour into your bottles.
    8. That is all. The Hair conditioner will thicken as it cools. 
    9. It will become thick, rich, creamy, and nourishing. 
    • Thursday, 8 June 2017
    • Leave a Comment
    • Vocational
    • More

    How to make your own Hair Cream

    How to Produce Hair Cream

    Hair serves the aesthetic function of adding beauty to the human body and also helps in collection of sweat, protect the skin from the harmful effect of ultraviolet rays and and foreign objects that could penetrate or harm the body. For you to achieve or have healthy hair,you need to pay good attention to your hair especially the hair on your head. The hair needs proper treatments,care and maintenance in other to grow well. It is very easy to make this happen even though there are several products out there in the market that claim to give you long and healthy hair,not all of them that work. You can take healthy diet and include some natural products in your diet in order to achieve healthy and long hair rather than including harmful or harsh chemicals to your health.


    Simple ingredients for hair production and their functions

    1. Petrolleum jelly - a purified mixture of hydrocarbon known as alkane obtained from refining petrol is used for treatment of burns,cuts,rashes,damaged feet,cracked lips and protection against cold and serves also as moisturizer to block the trans-epidermal water loss and traps the water under the skin. petroleum jelly in hair products function as to seal split ends on strands of hair,giving hair some deserved shine.
    2. Lanolin - a greasy material produced by the sebaceous glands of sheep or sheep wool. It acts as an excellent moisturizer for dry skin and hair and also function as an effective water barrier, i.e preventing further water escape(it holds moisture to the skin).
    3. Paraffin Wax- a wax-like solid that is a mixture of saturated hydrocarbons which are created by the distillation from Petroleum. Paraffin is typically used in cosmetics,candles polish and hair products-it serves as sealing/water proofing compound and also for treatment of hand and feet.
    4. Paraffin Oil -is used in lotions and creams,it serves as emollient which helps to seal moisture in the skin to prevent it from drying. Note: paraffin oil is harmful if swallowed or inhaled; inhaling paraffin oil can lead to nausea,diarrhea or vomiting,irritation of skin,eye and respiratory tracts.
    5. Industrial camphor - has numerous therapeutic qualities. The powerful fragrance of camphor isn't the only attraction in the chemical-it eliminates ache,scalp itching,prevents burn,scars,cracked heel,promotes hair growth by fortifying the hair roots as well as keeping it gleaming and it also combat hair loss.
    6. Menthol/peppermint - an antiseptic in nature,it helps to prevent dandruff and lice in addition to its usual cooling effect,providing an immediate relief from pain ,itchy scalp, fungus and bacteria,giving a refreshing sensation to the scalp.
    7. Glycerin-this helps to prevent breakage,especially while combing, de-tangling or manipulating hair when wet.
    8. Vitamin E- is a great stimulant for growth of capillaries, when the capillaries are healthy and profuse, the blood circulation in the scalp would be enhanced which will also promote strong and healthy hair growth,it slows down premature aging,promotes lustrous hair and prevent split ends.

    Quantity of ingredients needed for moisturizing hair cream

    1. Petrolleum jelly-1 and half cooking spoon
    2. Lanolin-1 table spoon
    3. Paraffin wax-little
    4. Paraffin oil-2 and half cooking spoons
    5. Menthol/peppermint-2 table spoons
    6. Industrial campor-3 table spoons
    7. Vitamin E- 3 table spoons
    8. Glycerin- 2 table spoons
    9. Perfume- as desired
    10. Colour- 1/2 tablespoon(optional)

    Production process


    1. Put a dry clean pot on heat
    2. Add paraffin oil and petroleum jelly; allow them to dissolve and blend properly
    3. Add lanolin and paraffin wax
    4. Add glycerin,vitamin E,
    5. Put off the heat and bring the pot down,allow to cool for about 4 minutes.
    6. Add menthol/peppermint,camphor, fragrance and colourant and leave to cool a bit
    7. Scoop into a sterilzed jar(container) capping it with tight fitting lid and allow to sit over night till the content settles down.
    8. Your hair cream is ready.
    • Leave a Comment
    • Vocational
    • More

    Saturday, 3 June 2017

    How to make your own Bleach


    Bleach is a chemical agent which is used to remove colour,whiten clothes and disinfect surfaces such as bathrooms,toilet,kitchen, cupboard, floors etc by the process of oxidation. Oxidizing bleach works by breaking down the chemical bonds that makes up chromophores .A chromophore on the other hand is a group of atoms within a molecule which are responsible for the colour of the molecule. a chromophore adds colour to a molecule because of the nature of the atoms involved and the way they are bonded with each other.


    BLEACH PRODUCTION/RECIPE


    General Uses Of Bleach
    Bleach is used to remove stain and brighten white and none coloured laundry
    It is used to remove stain from mugs, cups, plate and other kitchen utensils.( When used on kitchen utensil, be sure to rinse the items well and it should be diluted before usage).
    Bleach is used as household chemical for disinfecting bathrooms, kitchen cupboards,shelves and door handles.
    It is used for sanitizing swimming pools to control bacteria,viruses,fungi and algae.
    Iit is used for removing mildew and molds which may be hidden in damp places.
    It is used to remove stain from cutlery and cookery

    Bleach contains 5.25% solution of sodium hypochlorite added in 94.75% water. The process by which bleach whitens clothes is called oxidation. There are different types of bleach such as: - chlorine bleach: this contains hypochlorite; - oxygen bleach: this contains hydrogen peroxide .


    General Uses Of Bleach

    • Bleach is used to remove stain and brighten white and none coloured laundry
    • It is used to remove stain from mugs, cups, plate and other kitchen utensils.( When used on kitchen utensil, be sure to rinse the items well and it should be diluted before usage).
    • Bleach is used as household chemical for disinfecting bathrooms, kitchen cupboards,shelves and door handles.
    • It is used for sanitizing swimming pools to control bacteria,viruses,fungi and algae.
    • Iit is used for removing mildew and molds which may be hidden in damp places.
    • It is used to remove stain from cutlery and cookery
    Ingredients for the production of bleach
    - Caustic soda 1/2 cup
    - Soda ash 1 cup
    - Chlorine 1 cup
    - Water 5 litres
    Production process
    * Get a clean container and add water
    * Dilute caustic soda in the water (Mix ingredients in an open environment to avoid inhalation of toxic fumes and wear gloves and protective clothings while mixing bleach).
    * Add soda ash
    * Measure chlorine and add. Stir till you achieve a homogenous mixture ( chlorine and caustic soda solution will react to form hypochlorites bleach.
    * When that is achieved, cover and keep for 24 hours for the liquid to clearly separate from suspended particles.
    * Decant to remove impurities then package into different plastic containers with fitted lids.
    * Clearly label and safely store out of reach of children
    Note: hydrogen peroxides can be used in place of sodium hypochlorite (non toxic bleach) to be on the safer side


    • Saturday, 3 June 2017
    • Leave a Comment
    • Vocational
    • More

    Monday, 29 May 2017

    How to make your own Insecticide


    Insecticides are agents of chemical or biological origin that control insects.  Control may result from killing the insect or otherwise preventing it from engaging in behaviors deemed destructive.  Insecticides may be natural or manmade and are applied to target pests in a myriad of formulations and delivery systems (sprays, baits, slow-release diffusion, etc.). 
    INSECTICIDE PRODUCTION/ FORMULATION

    INGREDIENT: KEROSINE TYPE
    D.D.V.P ¼ ( NO PEST, SNIPER, D.D FORCE G0 90
    Industrial Camphor ¼ x2
    Formaline ¼
    Eucalyptus Oil ¼
    I.P.A ½
    Phenol ¼ x2

     METHOD
    Use Eucalyptus oil to dissolve the industrial Camphor and mix very well
    Add D.D.V.P an dmix very well
    Add Formalin and mix very well
    Add I.P.A and stir  very well
    Add five 5 litres of kerosene

    WATER TYPE

    INGREDIENTS:
    D.D.V.P ¼ ( Cypercot, CYPERMITRIN
    Industrial Camphor ¼ x2
    Formaline ¼
    Menthanol ½
    Phenol ¼ x2

    METHOD
    Use Menthanol to dissolve the industrial Camphor and mix very well
    Add the D.D.V.P and mix
    Add the formalin and mix
    Add five litres of water
    You can add colour if you like of your choice.


    • Monday, 29 May 2017
    • Leave a Comment
    • Vocational
    • More

    Sunday, 28 May 2017

    Germicide Production


    GERMICIDE FORMULATION  AND PRODUCTION

    Izal is one of the common germicides used regularly at home, it is highly concentrated and very effective when used in toilet cleaning, floor tiles and other surfaces, It also sells fast because of its regular use in hospitals, schools and other organisations. It all depends on how you want to do your business, you can actually introduce any of your products you produce to these organisations I've mentioned above.    

    Below is a step by step guide on how to produce Germicide. 

    Chemicals  To produce 5 liters of germicide you will need the following:  
     FORMULATION  
    To produce 5 liters of germicide you will need: 
    1. 1/8 Carbloic acid 
    2. 1/8 Lyzol
    3. 1/8 Phenol 
    4. 1/8 Pine oil
    5. 1/8 booster 
    6. 1/8 cencentrate 
    7. ¼ whitener 
    8. ¼ texapon 
    9. 2 liters of water 

     Preparation  

    1. Put texapon into an empty bucket (preferably a plastic bucket)
    2. Add pine oil and phenol into texapon and mix together
    3. Add whitener and mix very well 
    4. Add 1 liter of water and mix it together 
    5. Add concentrate 
    6. Then you add 1 liter of water again and mix together 
    7. Add lyzol and mix together 
    8. Add carbolic and mix together 

    Finally, add booster and mix together Note: To test for germicide, put some water in a plastic bucket, then put one or two drops of the already prepared germicide, it will become whitish in the water.  Your germicide is ready for use.

    Intreasted in becoming part of the skill acquisition team so you could obtain the detailed production method, 
    Click the Image below


    • Sunday, 28 May 2017
    • Leave a Comment
    • Vocational
    • More

    Thursday, 25 May 2017

    How to make Beads


    Getting Started
    Creating your own jewelry can be fun for so many reasons: not only do you get to tap into your creative side, you also have the chance to make something completely unique that reflects your personal style. Plus, it's very easy to make a beaded necklace. Read this article to discover helpful tricks on how to make a beautiful, beaded necklace.


    1 Gather your beading materials. Make sure to have all of your materials at hand: beads, beading thread, wire cutter, crimp beads, super glue, and closures to properly finish your necklace.
    • The best kinds of wire are flexible beading wire and beading thread.
    • All of these materials are easily available at your local craft store (Michael's or Joanne's, for example).

    2     Determine your necklace style. When considering which style of necklace you'd like to create, think about factors such as length. If you like shorter necklaces you might consider making a collar or choker. If you like longer necklaces, you might want a lariat length (longer, usually down to your chest) necklace.
    • You can also make up your own style and length. These are simple suggestions to give you a rough idea.
    • Note that the finished length of your beaded necklace includes the beads you've used and the length of the jewelry clasp of your choice.
    3 Select a length. The collar is the shortest necklace and amounts to roughly 13 inches total length. The choker is a little longer, and goes down to about 14 to 16 inches. A Lariat is the longest, coming in at about and over 45 inches. As mentioned above, you can also choose your own length and style


    4 Measure your neck, and then decide on a length. Take your tape measure, and loop it around your neck while looking at yourself in the mirror. Try small and big loops to see what you prefer. This will give you an idea of what your necklace might look like on your neck.


    Preparing The Design And Layout
    1 Arrange your beads on a flat surface, like a table or a desk. Play with the beads until you find the design you like best. Try different color variations, perhaps even think of having multiple layers of string. You might want a choker that wraps around your neck a few times, or maybe just one long loop.

    2 Place your bead board on your flat surface. A bead board is a tool that greatly facilitates the process of stringing beads, and improves your design skills rapidly. You can use it to measure the length of your necklace, while keeping the beads in place. If you plan on making necklaces regularly, or even occasionally, you should have a board at hand.
    • Place your beads in your chosen design at the number zero, and measure the length of your necklace using the numbers and dashes along the sides.
    • Use the channels for laying out beads.
    • The tray insets are for holding beads and findings.
    3 Cut your determined length of beading thread, plus 6 inches. For example, if you'd like to make a choker, cut a total of 22 inches of thread (16 inches plus 6).

    4 Gather 2 crimp beads, 1 clasp, and the beads for the desired necklace. The next part will give you tips on how to thread beads properly.

    Making Your Beaded Necklace

    1 Slide one bead onto the string. Then, slide the crimping bead in, and then add another bead about 1 inch (2.5 cm) or so down. Keep in mind that you're not yet transferring your design onto the thread. These are necessary, preliminary steps that will secure your necklace.
    2 Place one end of the clasp (the jump ring) on after the crimping bead. Then, make a loop with the stringing material.
    3 hread the end of the stringing material through the clasp section. Then add the bead-crimp-bead combo, and use the crimping tool/chain nose pliers to crimp the bead into place.
    • If using bead thread, you may wish to put a dot of super glue of hypo cement on either end to ensure that the beads and crimp stay on.)
    • These steps will protect the stringing material from rubbing on the ends of the crimp bead, which may cause the necklace to break.
    4 Slide your design onto the string. Once you're satisfied with your design, carefully remove one bead at a time, and string it onto the thread. Be sure to leave about 3-4 inches (7.5-10 cm) of stringing material at the end.

    5 Use a clasp section/ jump ring and the bead-crimp-bead combo. Try to push the remaining stringing material into the bead holes below the crimping bead.
    • Be careful not to pull the stringing material too tight. Leave a small amount of slack in the necklace (2-4 mm or 1/4 inch). This leaves room for the beads to move and rotate, so they don't rub on each other or the stringing material too much. If the stringing material is too tight the necklace will be rigid and this can make the design look angular instead of slightly rounded like a necklace should be.

    6 Crimp the second end and cut the stringing material with slush cutters. It is not recommended that you cut the wire too close to the crimp bead. 1 inch (2.5 cm) of wire, carefully hidden in the bead holes, is good insurance against breakage.

    Finished.


    To understand more on how to make beads and many more skills, join the team skill acquisition pro by clicking the image below


    • Thursday, 25 May 2017
    • Leave a Comment
    • Vocational
    • More
    Older Posts Home

    Pages

    Ultimate Lead Gen

    Labels

    • Agriculture (7)
    • Automobile (1)
    • Cooking (6)
    • Cryptocurrency (8)
    • ecommerce (6)
    • Facts (1)
    • Healthbenefits (5)
    • ICT (46)
    • News (8)
    • Online Business (13)
    • Presentation (7)
    • Travels (1)
    • Vocational (23)

    Contact

    Name

    Email *

    Message *

    List Building Program in 90 days
    Exclusive e-book by GetResponse and Joanna Wiebe

    Get paid to share your links!

    Follow by Email Popup Plugin

    (C) Skill 4 Glory 2021. Powered by Blogger.

    Copyright 2015. All Rights Reserved

    Design By Premium Blogger Templates | Distributed By Gooyaabi Templates